Sparkling, streak-free windows can instantly brighten up your home, making rooms feel fresher and more inviting. Yet achieving that perfect clarity isn’t always straightforward. Welcome to the ultimate step-by-step window cleaning guide, where we’ll walk you through everything from essential tools and techniques to pro tips for tricky situations. Whether you’re a DIY enthusiast looking to master window cleaning or a homeowner wondering when it’s time to call in the pros, this comprehensive guide covers it all.

Why Clean Windows?
Regularly cleaning your windows has numerous benefits. For one, clean windows boost curb appeal and let in more natural light – they can even improve indoor air quality by reducing dust and allergens that build up on glass and frames. More sunlight in your home doesn’t just make the space look better; it can also improve your mood and reduce the need for electric lighting during the day. In colder months, sunlight through clear glass adds a bit of warmth indoors, potentially easing the load on your heating system. Keeping windows clean prevents contaminants like hard water spots or pollen from etching the glass or degrading window seals over time. In short, clean windows not only enhance the beauty of your home but also contribute to a healthier, more energy-efficient environment and even help your windows last longer as part of regular maintenance.
Essential Tools and Supplies for Window Cleaning
What tools do you need to clean windows? At a minimum, you’ll want a squeegee, a scrubbing applicator, a bucket, and some microfiber cloths. Having the right equipment makes the job easier and helps you achieve a streak-free result. Below is a list of these and other useful window-cleaning supplies:
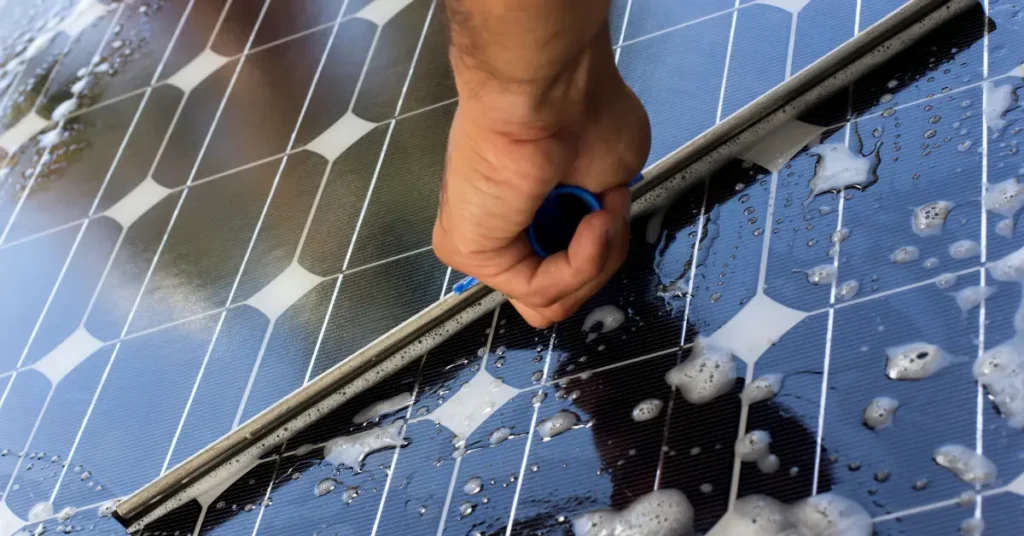
- Squeegee: The most important tool for streak-free glass. Use a good-quality squeegee with a rubber blade to wipe off cleaning solution in smooth, continuous strokes. A 10–14-inch squeegee is a common size for residential windows.
- Scrubber or Sponge: A wand-style window scrubber (sometimes called a strip applicator) or a sponge helps apply the cleaning solution and loosen dirt on the glass. It usually has a soft cloth or microfiber cover to gently scrub without scratching.
- Bucket: A bucket (preferably wide enough to fit the squeegee) to mix and hold your cleaning solution. Many people fill it with warm water plus a bit of mild dish soap or vinegar – an economical and effective cleaning mix.
- Microfiber Cloths: Lint-free microfiber cloths are ideal for wiping the edges of the window and for polishing the glass dry. They won’t leave behind fibers like paper towels can, and they excel at removing remaining streaks or water droplets.
- Glass Cleaner or Cleaning Solution: You can use a commercial glass cleaner spray or a homemade solution. A classic DIY formula is a mixture of equal parts white vinegar and water (or a few drops of dish soap in water) to cut through grime. Avoid cleaners that are very high in ammonia or alcohol, as these can leave streaky residue or even damage window coatings.
DIY Window Cleaning Solutions: Recipes, Variations, and Pro Tips
Homemade window cleaning solutions are a cost-effective, environmentally friendly alternative to store-bought cleaners—and they’re often just as effective. Whether you’re dealing with everyday dust, stubborn grime, or simply prefer a natural approach, there’s a DIY recipe to suit your needs. Here’s a guide to making your own window cleaning solutions, with explanations for each ingredient and tips for customizing your mix.
Classic Vinegar Solution (Everyday Cleaning)
Combine 1 part distilled white vinegar with 10 parts warm water in a spray bottle. Vinegar’s mild acidity breaks down mineral deposits, streaks, and everyday grime without leaving a residue, while using distilled water instead of tap water helps prevent streaks caused by minerals found in hard water. This solution is ideal for regular cleaning and is safe for most window types.
Dish Soap Boost (For Heavy Grime)
Mix 2 cups warm water, 1/4 cup distilled white vinegar, and 1/2 teaspoon dish soap (such as Dawn) in a spray bottle or bucket. This combination lifts greasy fingerprints, oily smudges, and outdoor grime, making it ideal for kitchen windows or exterior panes exposed to pollution or pollen. For best results, rinse with plain water after cleaning to remove any soap residue.
Alcohol-Enhanced Mix (Quick Dry & Spot Cleaning)
Combine 1 cup rubbing alcohol (isopropyl alcohol), 1 cup water, and 1 tablespoon white vinegar. Rubbing alcohol speeds up evaporation, reducing the risk of streaks and making this formula especially useful for spot cleaning or cold-weather cleaning when windows tend to fog. The vinegar adds extra cleaning power, while water dilutes the mix for safe use on glass.
Techniques and Tips for Streak-Free Window Cleaning
There are a few tried-and-true window cleaning methods and tricks professionals use to achieve spotless results. Mastering these techniques can elevate your window cleaning from a chore to an art, ensuring streak-free, gleaming panes every time. Key among these are the squeegee method, which efficiently removes water and dirt, and the traditional hand-washing approach, perfect for detailed work and smaller windows. Professionals also often employ specific types of cleaning solutions, specialized cloths, and careful attention to weather conditions to prevent streaking and ensure optimal drying. Follow these best practices to clean effectively without leaving streaks:
- Don’t Clean in Direct Sunlight: It might be tempting to clean on a sunny day, but direct sun can dry your cleaning solution too quickly, causing streaks to form. It’s best to clean windows on a cloudy day or when the glass is in shade, since sunlight can evaporate the water before you wipe it off.
- Dust and Dry Clean First: Before applying any liquid, remove loose dust and dirt. Wipe the window frame, sill, and glass with a dry cloth or use a vacuum with a brush attachment. This prevents you from creating muddy streaks once you start washing with water.
- Use the Right Cleaning Solution: Avoid cleaners with harsh chemicals like ammonia that can leave residues or even damage window seals. A simple solution of warm water and a few drops of dish soap works for most situations. Alternatively, use the classic vinegar-and-water mix for an eco-friendly option. (If you do use a commercial cleaner, spray it onto your cloth rather than directly onto the glass to avoid overspray on frames.)
- Scrub, Then Squeegee: Using your sponge or scrubber, cover the glass thoroughly with cleaning solution and gently scrub away grime. Then, remove the solution with a squeegee. Work from top to bottom in an overlapping “S” pattern or straight lines. Wipe the squeegee blade with a cloth after each pass to prevent drips and streaks from forming.
By applying these techniques – working in the shade, cleaning from top to bottom, and using proper tools – you’ll greatly reduce those annoying streaks and end up with brilliantly clear windows.
Dusting and Maintaining Blinds and Shades
Blinds and shades collect dust and allergens just like window glass and frames, so including them in your window cleaning routine is essential for a thorough, healthy clean. Regular care not only keeps your window treatments looking their best but also helps them last longer and function smoothly. Here’s how to tackle different types of blinds and shades efficiently:
Dusting Blinds
For wood blinds, use a dry microfiber cloth or a vacuum with a soft brush attachment to gently remove dust from each slat. Avoid using water or liquid cleaners, as moisture can warp or damage real wood. Faux wood, plastic, or metal blinds can handle a bit more moisture. Start by dusting the slats with a dry cloth or vacuum. For a deeper clean, wipe the slats with a damp cloth or sponge soaked in a mild detergent solution. For a thorough refresh, you can remove the blinds and immerse them in a bathtub filled with lukewarm water and a small amount of dish soap. Rinse with clean water and let them air dry completely before rehanging. As a routine tip, tilt the slats entirely up, dust, then fully down, and repeat to ensure both sides are clean.
Cleaning Shades
Fabric shades should be dusted regularly with a vacuum cleaner using a brush or upholstery attachment. For spot cleaning, use a slightly damp cloth to blot away smudges or fingerprints, but avoid soaking as excess moisture can cause staining or warping. Cellular or pleated shades are best maintained by gently vacuuming with a low-suction brush attachment. For stubborn spots, lightly dab with a damp cloth, taking care not to crush the pleats. Roller shades can be wiped down with a dry or slightly damp microfiber cloth. For stains, spot clean with mild soap and water, then let them air dry completely before rolling them up.
Maintenance Tips
Clean blinds and shades at least every few months, or more frequently in dusty environments, and always refer to the manufacturer’s care instructions for your specific window treatments. After dusting or cleaning, ensure all components are dry before adjusting or rehanging to prevent the growth of mold or mildew. Including blinds and shades in your window cleaning routine helps maintain a fresh, allergen-reduced home and keeps every part of your windows looking their best.
The Importance of Cleaning Window Frames and Sills
While sparkling glass gets most of the attention, clean window frames and sills are just as crucial for a truly polished look and long-lasting windows. Neglecting these areas can lead to a buildup of dirt, dust, pollen, and even mold, which not only detracts from your view but can also cause discoloration, unpleasant odors, and even damage to your windows over time. Regularly cleaning frames and sills helps prevent grime from transferring to the glass, ensures smooth window operation, and maintains the overall health and appearance of your window units.
Techniques and Tools for Effective Frame and Sill Cleaning
Start by using a soft brush or the brush attachment on your vacuum to remove loose dust, cobwebs, and debris from the frame, sill, and window tracks. Pay special attention to corners and crevices where dirt tends to collect. For a deeper clean, wipe down the frames and sills with a microfiber cloth dampened with warm, soapy water (a few drops of mild dish soap in a bucket of water works well). Microfiber cloths are ideal because they trap dirt and are gentle on surfaces.
For stubborn grime or sticky residue, apply a bit more pressure with your cloth or use a soft-bristled toothbrush to gently scrub trouble spots. If you encounter mineral deposits or tough stains, a small amount of white vinegar on your cloth can help break them down—just be sure to test in an inconspicuous area first.
Dealing with Stubborn Grime
For persistent spots, such as sticky residue or mildew, try a gentle solution of white vinegar and water or a small amount of mineral spirits applied with a soft cloth. Always test your cleaning solution on a hidden area first to ensure it won’t damage the finish. Never use abrasive scrubbing pads, steel wool, or harsh chemicals, as these can scratch, discolor, or degrade the frame material. It’s important to steer clear of abrasive cleaners, rough sponges, or strong solvents that can harm window frames and sills. These products may leave scratches, strip paint, or cause permanent discoloration, especially on painted, stained, or coated surfaces. Stick to soft cloths, gentle brushes, and mild cleaning solutions to keep finishes looking their best.
Step-by-Step Window Cleaning Guide
Now that you’re equipped with knowledge of the essential tools and effective techniques, it’s time to put it all into practice. Here is a comprehensive, step-by-step window cleaning guide designed to help you achieve a streak-free, perfectly clear result every single time:
- Prep the Area: Remove any curtains, blinds, or nearby objects that might get in the way or be damaged by water. If you’re cleaning interior windows, lay a towel or drop cloth on the floor beneath the window to catch drips. It’s also a good idea to choose a time when the sun isn’t shining directly on the glass.
- Remove Dust and Cobwebs: Before using any liquid, gently dust the window panes, frame, and sill. Use a soft brush or dry cloth to clear away cobwebs, dust, and loose dirt. This dry cleaning step will prevent you from rubbing grit into the glass once you start washing.
- Clean and Vacuum Window Screens: Use a vacuum cleaner with a soft brush or upholstery attachment to gently vacuum both sides of the screen. This step removes loose dust, pet hair, and cobwebs without pushing dirt deeper into the mesh.
- Prepare Your Cleaning Solution: Fill a bucket with clean, warm water and add a few drops of dishwashing liquid. If you prefer a vinegar solution, mix roughly one part white vinegar to ten parts water. Using warm water tends to help dissolve grime better. Avoid making the solution too soapy, as excess suds can leave residue.
- Wash the Glass: Dip your scrubber or sponge into the solution and wring out the excess so it’s wet but not dripping. Starting at the top of the window pane, scrub the glass in a circular or overlapping pattern. Make sure to cover the entire surface, paying extra attention to any particularly dirty spots or bird droppings. Rewet your scrubber as needed to keep the glass nicely lubricated while you clean.
- Squeegee the Window: Now take your squeegee to remove the soapy water. Position the squeegee at the top corner of the glass, holding the blade at about a 30° angle against the pane. Pull it steadily across the window in a straight line, wiping the dirty water off. After each pass, wipe the squeegee’s blade with a clean cloth to prevent water drops. Continue this process, slightly overlapping each previous stroke, until you’ve squeegeed the entire window. (If you prefer vertical strokes, first create a dry horizontal line along the very top of the glass using your cloth or the squeegee edge, then start each downward stroke from that dry edge to avoid streaks.)
- Wipe Edges and Sills: Once the bulk of the water is removed, use a microfiber cloth to wipe around all the window’s edges and the sill. A lot of water can collect at the bottom or corners of the pane, so absorb that before it has a chance to dry. Also, wipe any water off the window frame or sill area.
- Check and Touch Up: Examine the glass from different angles. If you notice any streaks or spots, lightly mist a bit of your cleaning solution (or plain water) on that area and immediately polish it with a clean, dry microfiber cloth. Often, a quick buff is all that’s needed to eliminate a small streak. Replace the now-clean window’s screens, curtains, or blinds once everything is dry. Rinse out your scrubber and wash your microfiber cloths so they’re ready for next time.
Special Considerations for Double-Hung Windows
Double-hung windows are a popular choice in many homes thanks to their classic look and practical design. Unlike single-hung or fixed-pane windows, double-hung windows feature two movable sashes that can slide up and down independently. This unique construction not only improves ventilation but also makes cleaning both the interior and exterior surfaces much easier—if you know the right techniques.
Why Double-Hung Windows Stand Out
The key advantage of double-hung windows is their ability to tilt inward for easy cleaning. Most modern double-hung designs allow you to unlock and gently tilt each sash inward, making them much easier to maintain. This feature eliminates the need to climb ladders or lean dangerously outside to clean exterior glass, especially on upper floors. Additionally, tilting sashes make it possible to clean both the interior and exterior surfaces of the window from inside your home, which is not only safer but also more convenient. This can save time and effort during regular cleaning and is particularly beneficial for multi-story houses where exterior access is difficult. Furthermore, the tilting mechanism is typically designed to be user-friendly, making window maintenance accessible for people of all ages.
Cleaning Techniques
Begin by unlocking the window and raising the lower sash a few inches. Locate the tilt latches at the top of the sash—usually small tabs or buttons. Slide or press them inward and gently pull the sash toward you until it tilts into the room. Repeat this process with the upper sash if needed, lowering it slightly before tilting it inward. With both sashes tilted in, you can easily reach and clean the outside surfaces of the glass from inside your home. Use your preferred cleaning solution and tools, working from top to bottom. Start with the exterior side of the upper sash, then the interior side, and repeat the process on the lower sash. This order helps prevent drips or streaks from dirtying cleaned areas.
Double-hung windows rely on balance mechanisms or springs to move smoothly, so be gentle when tilting or cleaning the sashes. Never force a sash if it feels stuck; if you notice resistance, check for debris in the tracks or consult the manufacturer’s instructions. While the sashes are tilted in, take the opportunity to wipe down the tracks and remove any dust or debris, which helps the windows operate smoothly and extends their lifespan.
Tips for Success
- Always support the sashes with one hand while cleaning to prevent them from snapping back into place.
- If your double-hung windows are older and do not tilt in, exterior cleaning may require a ladder or professional help for upper stories.
- After cleaning, ensure both sashes are securely locked back into place.
Utilizing the tilt-in feature and applying these methods allows you to safely and effectively clean double-hung windows, both inside and outside, without needing ladders or taking unnecessary risks. This simplifies routine window care and ensures your views remain clear all year long.
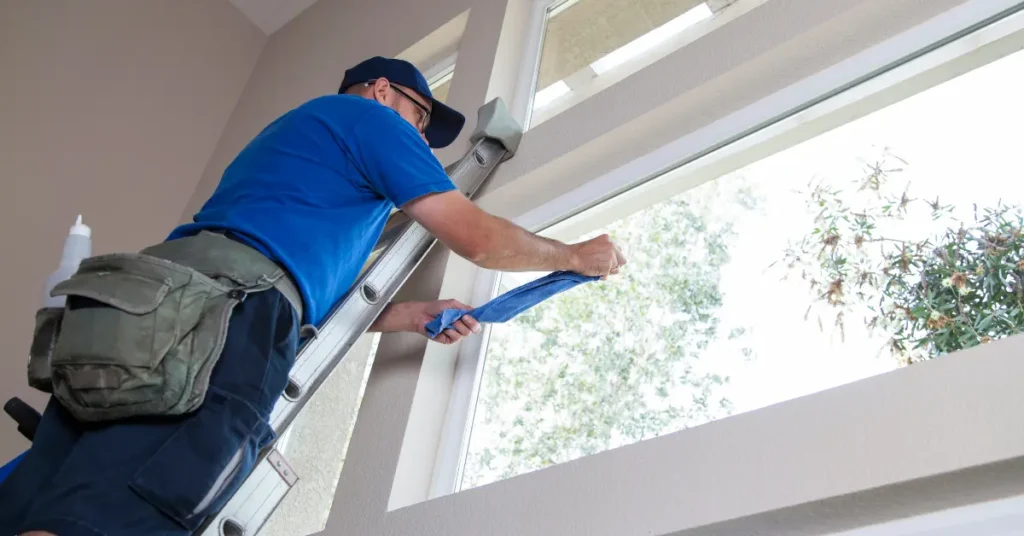
Cleaning Exterior Second-Story Windows
One common challenge for homeowners is figuring out how to clean exterior upstairs windows safely and effectively. Reaching those high outside panes can be tricky, but fortunately, some specialized tools and methods help you get the job done. Here are some approaches for tall or second-story windows:
- Telescoping Pole: One effective solution is to use a telescopic window cleaning pole with a squeegee and scrubber attachment. Extend the pole to reach the second-story window while you stand on the ground (or a secure lower-level balcony). Dip the scrubber in your cleaning solution and scrub the glass, then attach the squeegee and pull it down the pane to remove the water. This method allows you to clean upstairs windows without a ladder. It may take a bit of practice to control the pole, but it can result in clean, streak-free windows at heights that are otherwise inaccessible.
- Water-Fed Pole System: Some professional cleaners (and ambitious DIYers) use water-fed pole systems for higher windows. These systems pump purified water through a long, extendable pole that has a brush at the end. You scrub the window with the brush while a gentle stream of pure water rinses away the dirt. Because the water has no minerals, it can be left to air dry without spotting. Water-fed poles can often reach second- or even third-story windows from the ground. This method is great for exterior cleaning as it eliminates the need for a squeegee step; however, the equipment can be costly and is more commonly used by pros.
- Ladder (Use with Caution): For high exterior windows, traditional extension ladders can be used. Ensure ladder safety: stable, level ground, someone holding the base, careful climbing, and three points of contact while working. Clean with a scrubber and squeegee as usual. If uncomfortable, consider other methods or hiring a professional.
- Magnetic Window Cleaner: Magnetic window cleaners offer an innovative solution for hard-to-reach windows, particularly upstairs panes or those with difficult screens. These two-halved devices magnetically clamp through the glass, allowing you to clean the exterior from inside. Ideal for smaller windows and light cleaning, they provide a quick touch-up but may still require wiping internal drips or a more hands-on approach for stubborn dirt.
Each of these methods can help you reach and wash exterior windows that are one or more stories above ground. Always prioritize safety: never lean dangerously out of an upper window, and be mindful of your own limitations. If a window is simply too high or challenging, it may be time to call in professionals who have the proper gear for high-rise work.
When to Hire Professional Window Cleaners
As a rule of thumb, if your windows are very numerous, very large, or very high off the ground – or if you simply don’t have the time – calling professional window cleaners is the smartest choice. Professional companies like Max’s Cleaning Services have trained crews for homes and commercial high-rise window cleaning alike, using specialized equipment to ensure safe and thorough results. Here are some top reasons to consider hiring professionals rather than doing it yourself:
- Safety and Convenience: When you hire residential window cleaners, you avoid the risks that come with climbing ladders or hanging out of windows. You won’t need to balance on a stool or second-story ledge with a squeegee. Instead, you can let experts handle the dangerous parts while you stay safely on the ground. This not only prevents potential injuries but also saves you the hassle of wrestling with tall ladders and dripping hoses. In short, it’s far more convenient to have someone else do the high-up or difficult work.
- Quality Results: A professional window cleaning service uses high-grade cleaners and equipment (like commercial squeegees, strip washers, and purified water systems) that can achieve a spotless finish. They also have the techniques honed from experience to avoid streaks and drips. For example, top-rated companies such as Max’s Cleaning Services can dissolve and remove stubborn stains (like bird droppings, hard water spots, or construction debris) without scratching or damaging the glass. The result is windows that are truly crystal-clear and stay cleaner longer than a basic DIY job might manage.
- Time Savings: Cleaning all the windows in your home – inside and out – can take many hours, especially if you have a larger house or hard-to-reach windows. Many homeowners choose to hire window cleaners to save their valuable time. Instead of spending your entire Saturday going up and down a ladder and wiping panes, you could be doing something else and let a crew knock out the whole job efficiently. Professionals tend to work in teams and have a system, so they can often clean in a fraction of the time it would take an amateur.
- Affordability: Professional window washing isn’t as expensive as you might think. In fact, the average whole-home window cleaning job in the U.S. costs around $200. Considering that this may cover dozens of windows, including those tricky high ones, it can be quite cost-effective. Many companies also offer discounts for regular maintenance schedules or for combining window cleaning with other services. When you weigh the reasonable cost against the time and effort you’d spend doing it yourself – not to mention the professional quality results – hiring a pro often delivers great value.
- Easy Scheduling: It’s very easy to book window cleaners for a one-time appointment or recurring service. Most professional companies offer flexible scheduling; you can often get a free quote online or over the phone, then set up a cleaning date that suits you. You won’t have to worry about remembering to clean the windows each season – you can arrange for quarterly or bi-annual cleanings and then forget about it. The professionals will show up as scheduled and get the job done. This kind of reliable, set-it-and-forget-it maintenance is a big perk for busy individuals or for businesses that want to keep their premises looking sharp year-round.
While DIY window cleaning is fine for many situations, there are definitely times when calling in the pros makes sense. High or hard-to-reach windows, very dirty jobs, or simply the desire for a perfect, streak-free finish are all good reasons to consider professional help. A service like Max’s Cleaning Services can take care of the hard work and deliver a sparkling result, freeing you up and giving you peace of mind.
Cleaning your own windows can be a satisfying task – it’s amazing how much of a difference clear, bright glass can make in your living space. By following the tips, using the proper tools, and sticking to the techniques in this guide, you can achieve a streak-free shine on your windows and keep them looking great all year. Remember to clean regularly (at least twice a year, or more often if you live in an area with lots of dust or pollen) so grime doesn’t get a chance to build up. And whenever the job feels like more than you want to tackle – whether it’s those towering foyer windows or an entire office building’s glass facade – know that professional window cleaners are just a call away to help.
Sources
- Pella Corporation – “5 Benefits of Window Cleaning”pella.com
- S&K Building Services – “What Is the Best Tool for Cleaning Windows?”skbuildingservices.com
- Power Home Remodeling – “How to Avoid Streaks When Cleaning Your Windows”powerhrg.co
- This Old House – “How to Wash Windows Like a Pro”thisoldhouse.com
- Simon’s Window Cleaning – “Mastering the Art of Washing the Second Story Windows: Tips and Techniques”simonswindows.com
- Window Hero – “High Rise Window Cleaning: Safe, Smart, and Streak-Free Solutions for Tall Buildings”windowhero.com
- HomeAdvisor – “Benefits to Hiring Window Washers”homeadvisor.com